
Layers & sequence — Stitch-out order and organization
How do I open the Layers panel?
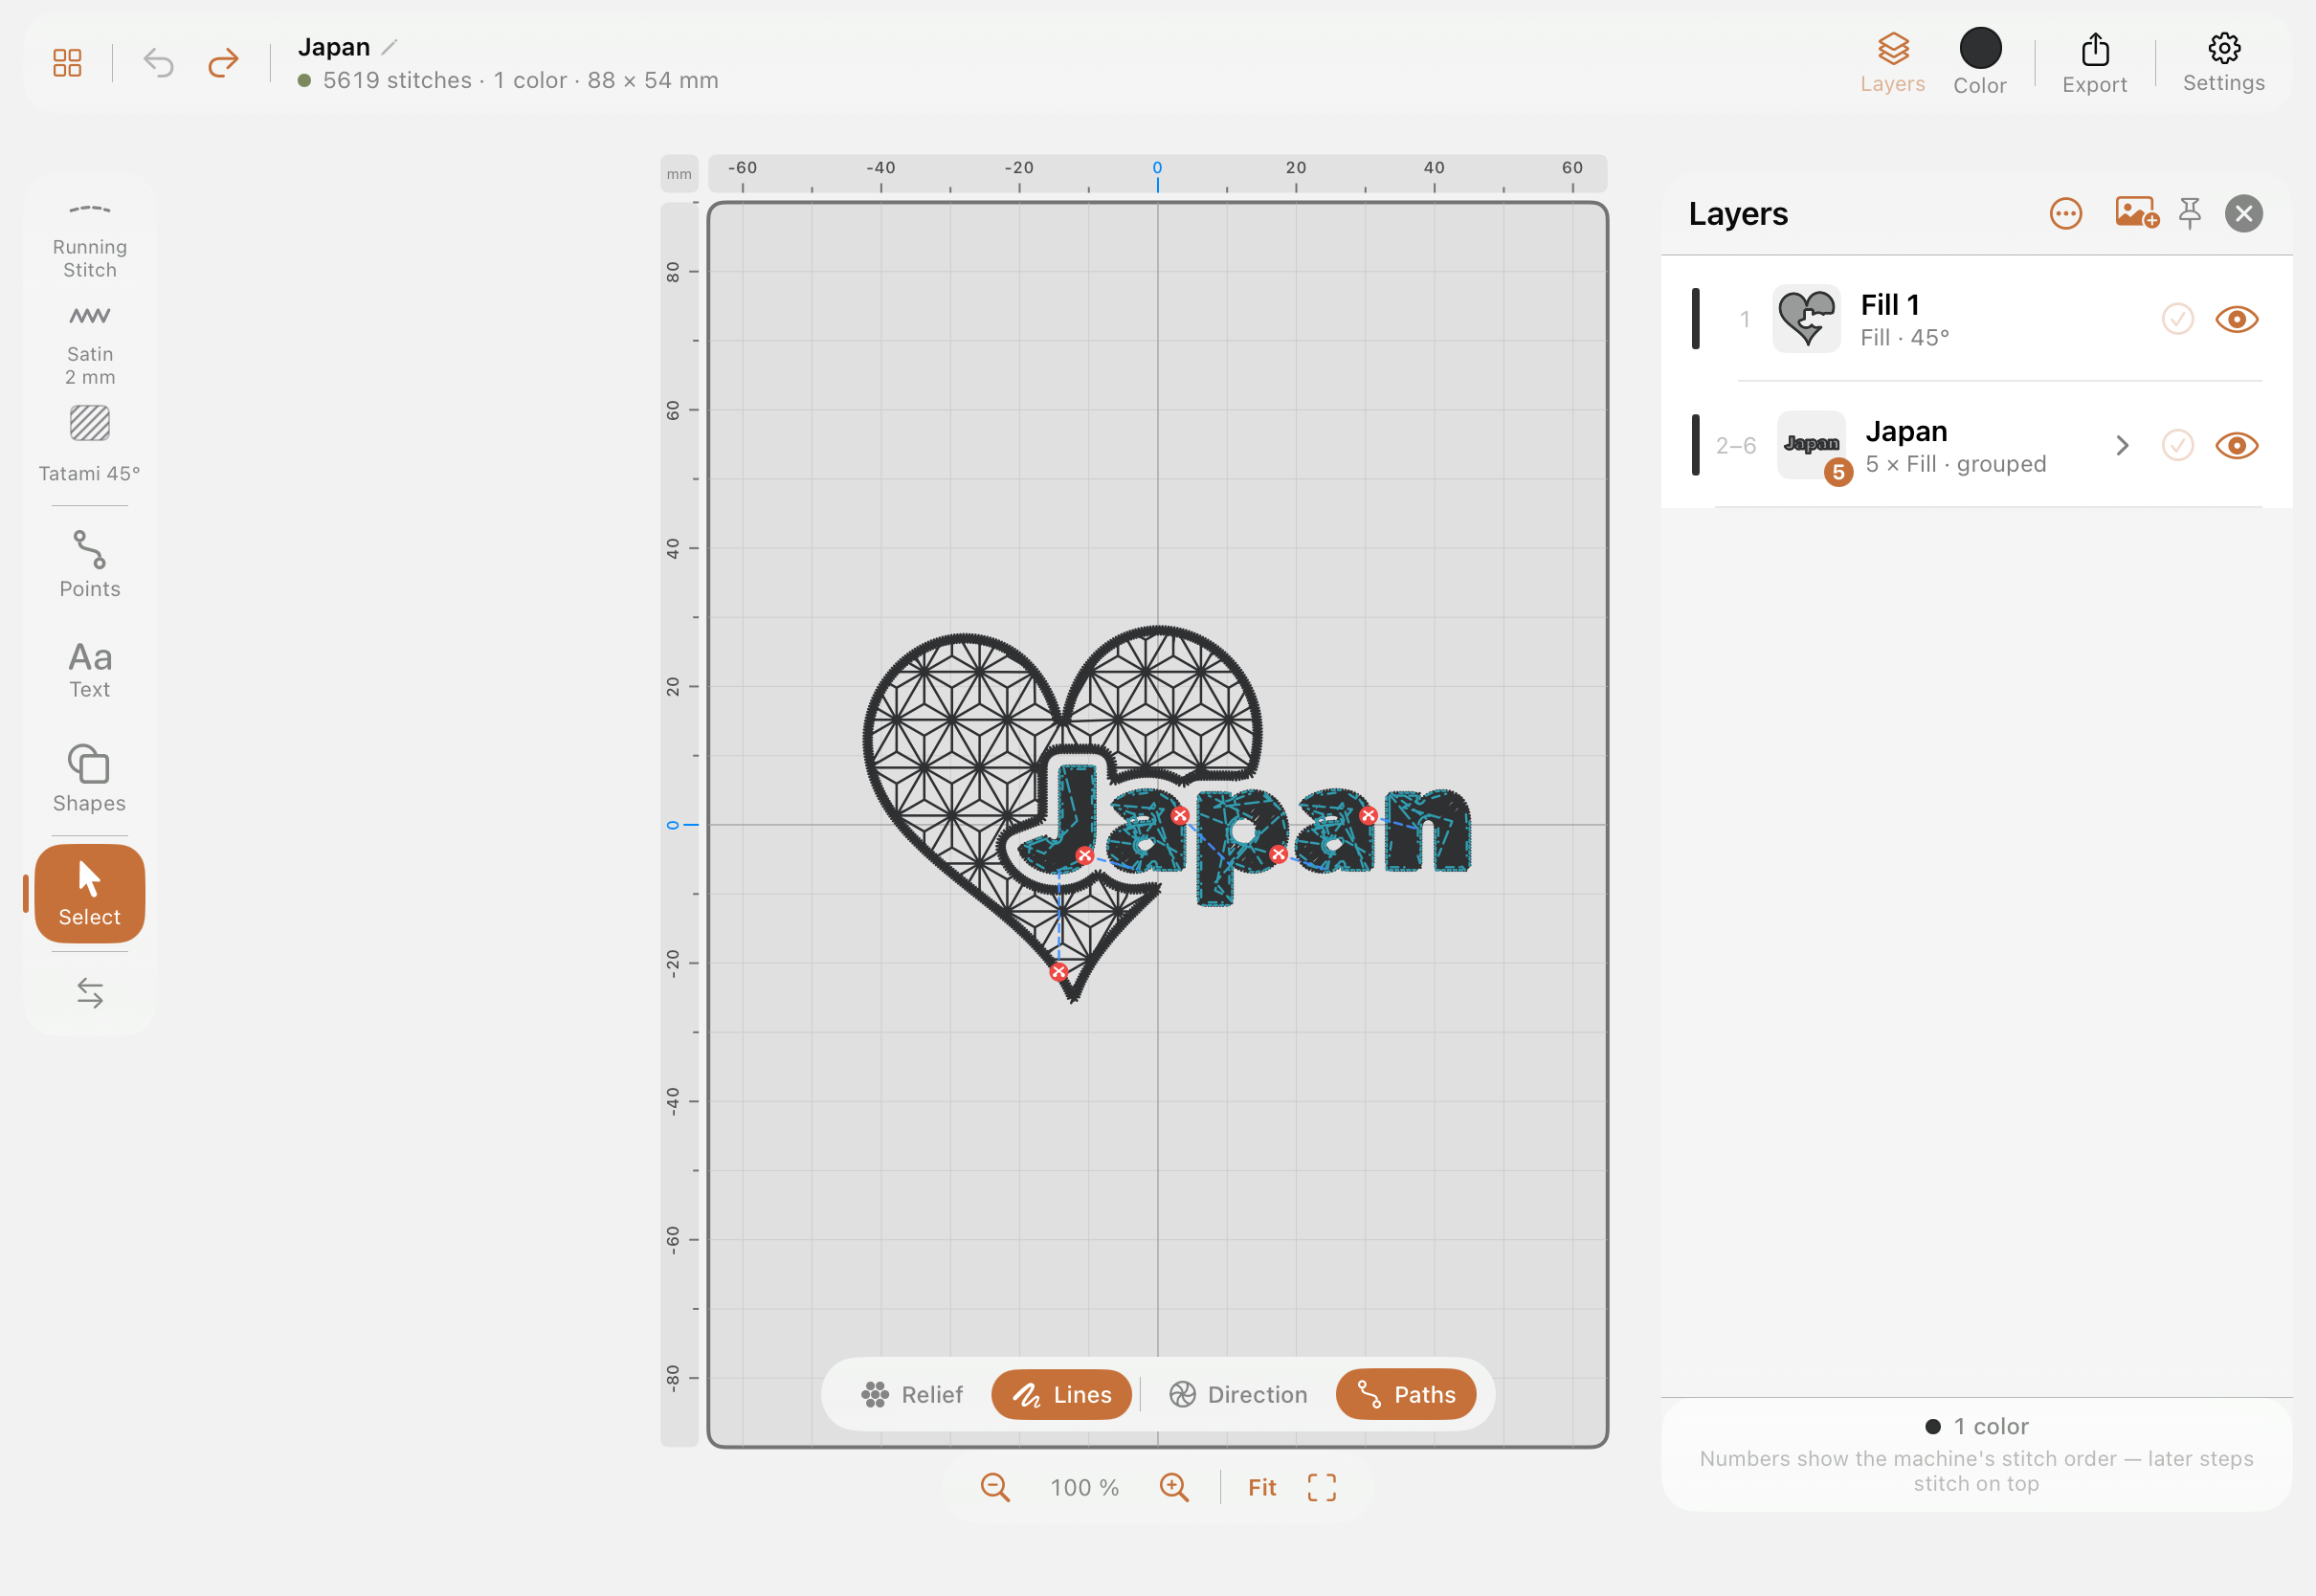
Section titled “How do I open the Layers panel?”Tap Layers in the top bar. It’s a full-height panel, not a sheet — it stays open alongside the canvas while you keep working.
What do the numbers next to each row mean?
Section titled “What do the numbers next to each row mean?”The actual machine stitch order, not just the row’s position in the list. A batched group of objects that share a color can show something like “2·4” — meaning this row’s contents are stitched at positions 2 and 4 in the machine sequence, with something else in between. This matters because drawing order and stitch-out order aren’t always identical once color batching has reordered things for fewer thread changes.
How do I reorder layers?
Section titled “How do I reorder layers?”Long-press and drag a row — there’s no separate “edit mode” to switch into first. Swipe a row left for quick delete or duplicate.
How do I group or merge objects?
Section titled “How do I group or merge objects?”Checkmark-select two or more rows to reveal a bottom bar with Group, Merge (only offered when every selected object shares the same stitch kind), Paste style, and Delete.
What’s in the ”…” overflow menu?
Section titled “What’s in the ”…” overflow menu?”- Optimize sequence — reorders stitching for fewer thread trims and color changes; if the reordering would be aggressive enough to visibly change how the design looks stitched (not just its efficiency), it shows a confirmation dialog first rather than silently changing your design’s appearance.
- Add machine stop — inserts a draggable command row into the sequence, e.g. to pause for a manual step.
- Reset opacities — clears any canvas-only opacity overrides back to fully solid.
What do reference images look like in the Layers list?
Section titled “What do reference images look like in the Layers list?”Pinned at the top of the panel. The eye icon next to a reference row is the only way to select and unlock it for on-canvas move/scale/rotate — while locked (the default), it stays out of the way so you don’t accidentally drag your traced photo instead of your stitch object.
How does converted text appear in Layers?
Section titled “How does converted text appear in Layers?”Each letter collapses into its own row after Convert to Outlines, with a small chevron to disclose the individual node-editable path underneath — easy to miss if you don’t know it’s there.
What does layer opacity actually affect?
Section titled “What does layer opacity actually affect?”It’s a canvas display setting only — a caption in the inspector says so directly: it never changes what’s actually sewn. The exported stitch file always sews at full, solid thread regardless of what opacity you’ve set for previewing.
What’s “Thread to next object”?
Section titled “What’s “Thread to next object”?”A per-object setting — Auto / Trim / Jump / Run — controlling how the machine gets from the end of this object to the start of the next: cut the thread, jump without cutting, or lay a connecting run stitch. “Auto” lets StitchPencil decide based on distance and color.